
In this article we explain how you to create a custom survey.
Create a custom survey
APPLIES TO:
You can create custom feedback surveys to send to your contacts. These surveys can have custom questions and options including star ratings, radio selects and single line text fields.
Please note: custom feedback survey responses will be associated with the contacts that complete the survey. If you'd like your survey responses to be associated with tickets, you can create a customer support (CES) survey.
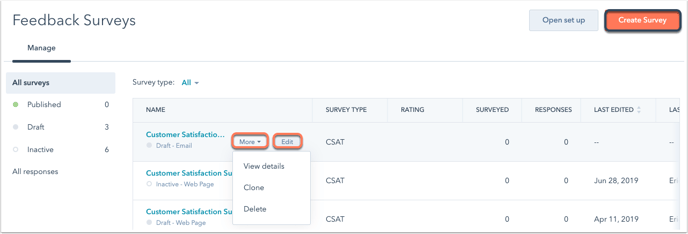
- In your HubSpot account, navigate to Service > Feedback Surveys.
- You can edit, clone, or delete an existing survey.
- To edit, hover over the survey and click Edit. If you're editing a survey that has already been published, you cannot edit or delete its survey questions.
- To clone or delete, hover over the survey and click the More dropdown menu, then select Clone or Delete.
- To create a new survey, click Create survey in the upper right.
- In the next page, select Custom survey, then click Next.
 Select the delivery method for your survey by clicking Email or Shareable Link.
Please note: to send an email survey, users must have Marketing access permissions, including Publish access to the Email tool.
-
- To continue, click Create.

-
- Click the edit pencil icon at the top to give your survey a unique name.
Email (Email surveys only)
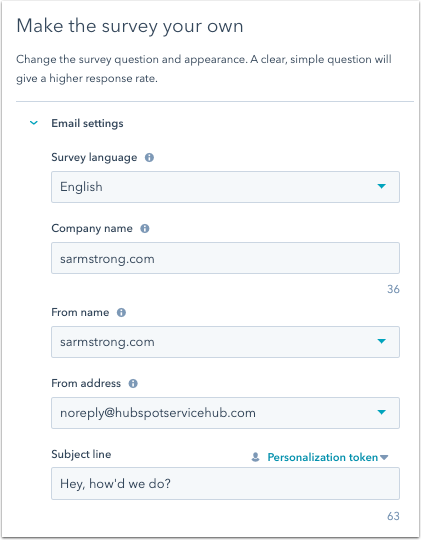
- In the Email settings section, click the Survey language dropdown menu and select the language you want the survey to be in.
- Set the Company name, From name and From address for your survey. You can select the name and address of any user in your account.
- Enter your subject line. To insert a personalisation token in the subject, click contacts Personalisation token, click the Add contact token dropdown menu and select a token, enter a Default value and click Insert.
- In the Advanced settings section, you can select an office location.
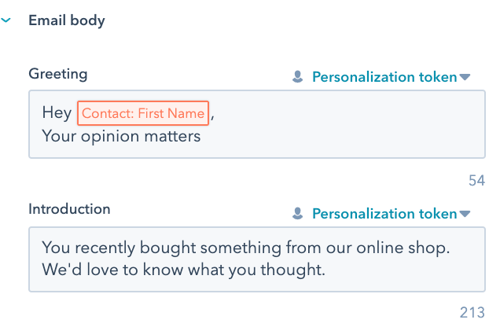
- In the Email body section, enter a Greeting and Introduction for your survey email. Click contacts Personalisation token to include a personalisation token.
- In the Theme section, to upload an image for the email survey, click to toggle the Featured image switch on and click Replace. In the right panel, select an image or click Add image to upload a new image.
- To edit the text of the start survey button, enter Button text.
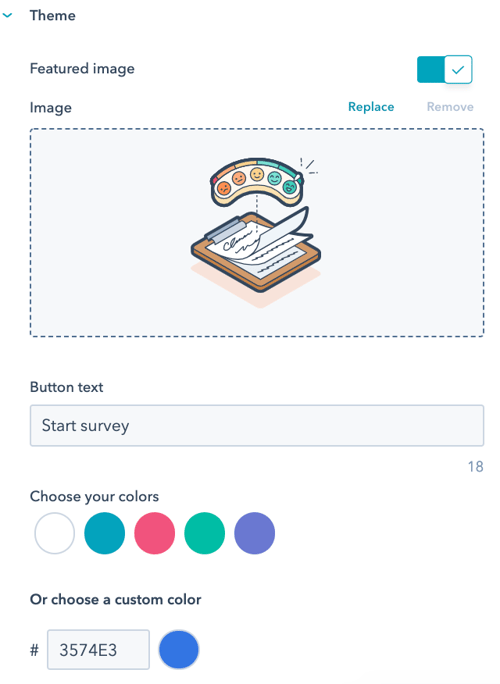
- Select one of the default color options, or set a custom color by entering a hex color value or clicking the color picker to the right.
- In the right panel, preview how the question will look.
- To continue, click the Survey tab.
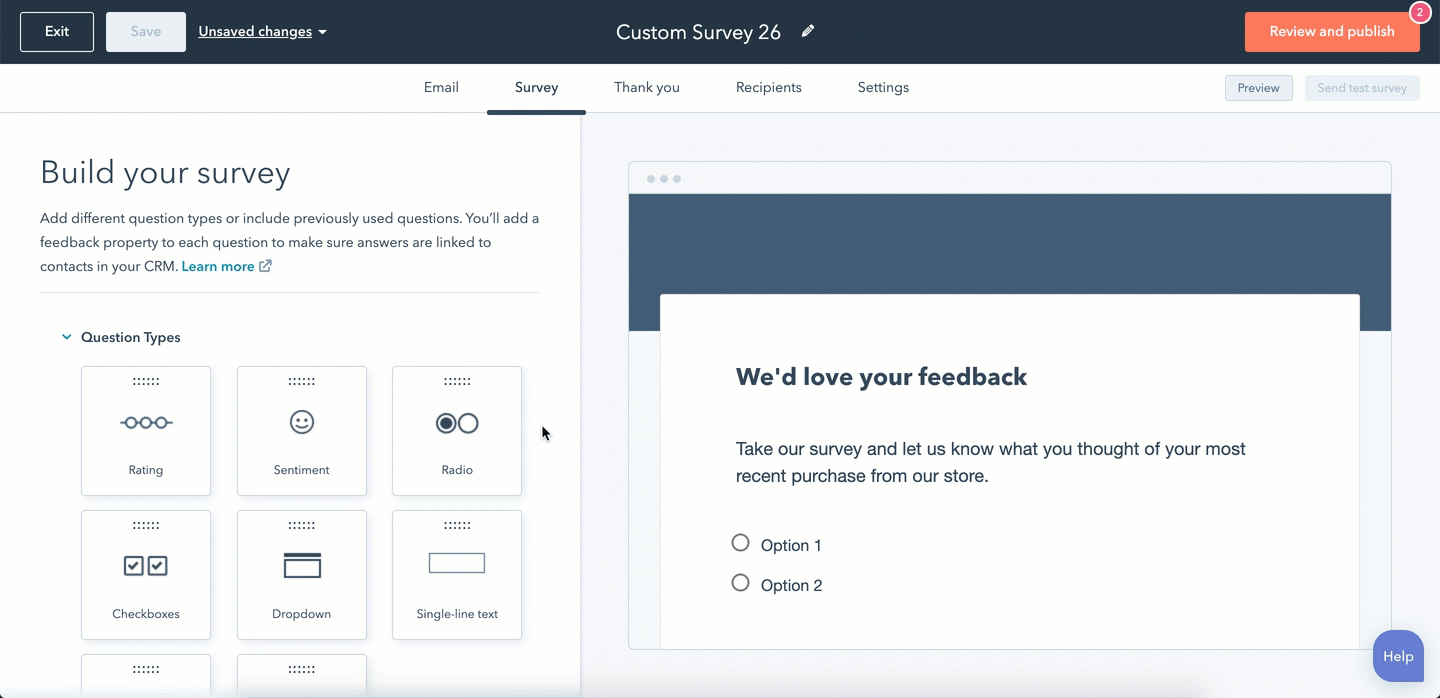
Survey
- In the Build your survey section, you can select the types of questions you will be asking your respondents. Click or drag a question to the right panel to build your survey:
- To add an existing question, select a question from Previously asked questions.
- To create a new survey question, select one of the Question types. You can add an industry standard question for net promoter score or customer satisfaction by selecting the NPS(beta) or CSAT(beta) module.
Please note: if you're editing an existing survey that has already been published, you cannot edit or delete its survey questions.
-
In the right preview screen, click a question to edit its details. In the left panel:
- Toggle the switch on to make a question required.
- Click the text box to edit the text or format of the survey question. You can also enter Help text to assist your visitors in completing the survey. If you're creating an NPS question, you cannot edit the text or format of the survey question.
- If you're creating a Rating question, click the Icon dropdown menu, and select Circle or Star to choose the type of icon used.
-
- In the Feedback property section:
- Click Create feedback property to create a new property to store your question's response data. In the right panel, you can edit the label or add a description. Once you're done, click Next, then click Create. Any property you create in the Survey editor can be used as a filter in other HubSpot tools, such as reports.
- To use an existing feedback property, click and type in the Search existing feedback properties bar, or if applicable, select a property from the list. Any property you select in the Survey editor can be used as a filter in other HubSpot tools, such as reports.
- In the Feedback property section:
-
- Once you've selected a corresponding feedback property, depending on the property field type, click to edit the property's options, values, and labels. For Rating properties, select the Reverse scale checkbox to change the order of your rating values.
- In the Common modules section, click and drag a module to the right panel to add a header, paragraph of text, image, or divider to your survey.
- To add an additional step to your survey, click and drag the Step module to the right panel, then customise the modules within each step. Once published, each step will have its own page within the survey and a progress bar will appear to show users their progress.
- To continue editing an Email survey, click the Thank you tab. To continue editing a Shareable link survey, click the Options tab.