
In this article we explain you how to create and manage tickets within HubSpot.
Create a new ticket from the tickets index page
- In your HubSpot account, navigate to Service > Tickets.
- In the upper right, click Create ticket.
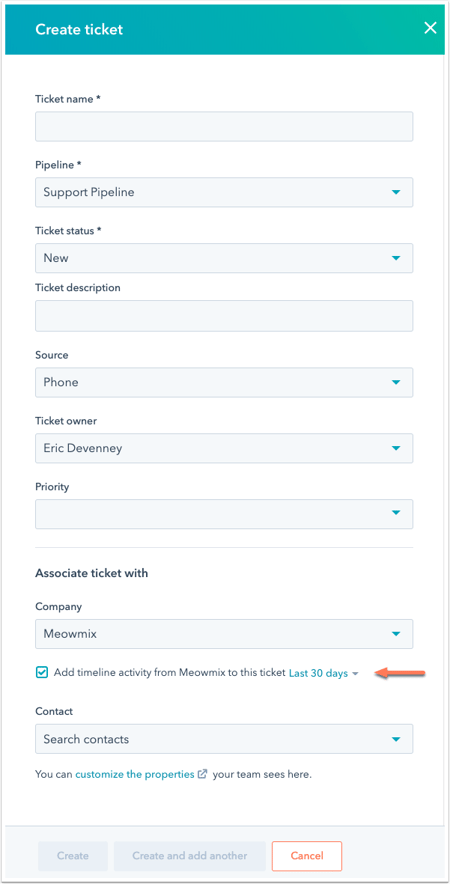
- In the right panel, enter your ticket details. If you want to customize which properties appear here, click customize the properties at the bottom. The following fields are required by default:
- Ticket name: provide a description for this ticket.
- Pipeline: assign this ticket to a specific ticket pipeline you've created.
- Ticket status: choose a specific ticket stage from the pipeline you've selected.
- To associate a company or contacts with the ticket, click the Company and Contact dropdown menus, then search for the company or contacts. Learn how to associate the relevant company or contact activities to the ticket timeline in this panel.
Create a ticket from a record
To create a ticket from a record you want associated with the ticket:
- In the right panel of the record, in the Tickets section, click + Add.
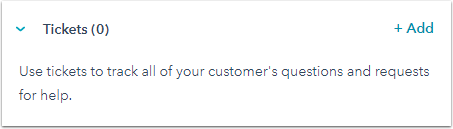
- To create a new ticket:
- Enter the details for your new ticket in the Create a new ticket tab. By default, the ticket will be associated to the contact or company record. Learn more about how you can pull in the timeline activity from the contact and company records.
- Once you're done, click Create. A new ticket will be created.
The new ticket will be associated with the record. Learn more about the activities that will be associated to these different records.
Create tickets in your conversations inbox
You can create tickets in your conversations inbox from the following channels:
- Connect a HubSpot form in the conversations inbox. Submissions to HubSpot forms will create tickets in your account. You can also respond to the visitor's inquiry directly in your conversations inbox. Learn how to add the form to your knowledge base, to your website and landing pages, or to your external website pages.
- Create tickets from new incoming emails sent to your team email account.
- If you're using a connected Facebook Messenger account, create a bot chatflow for the Facebook Messenger account and use the Submit ticket action.
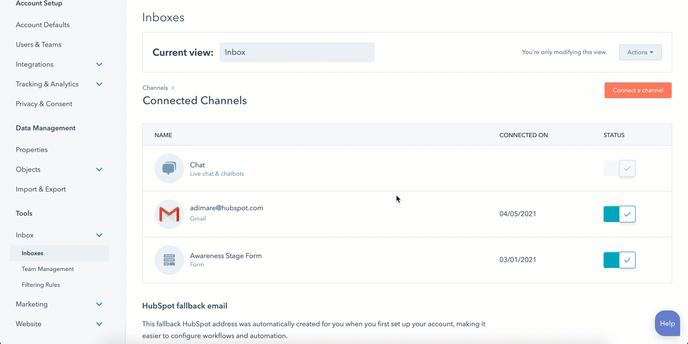
To view which of your email and form channels are connected to ticket pipelines:
-
In your HubSpot account, click the settings settings icon in the main navigation bar.
- In the left sidebar menu, navigate to Inbox > Inboxes.
- In the Connected Channels section, any connected ticket pipelines will appear in the corresponding channel’s Connected to column. Click the name of the pipeline to edit the pipeline settings.
